Thursday, August 29, 2013

Zucchini Bread


The last post of garden week will not be a savory one, but a sweet one. A sweet, delicious, moist bread recipe. I found this recipe when I was in high school. It was in one of those books that we sold as a fundraiser where parents all contributed recipes. [[I think I have 4 or 5 copies]] I probably filled my recipe book selling quota by selling one to every member of my family. I'm not positive, it just really sounds like something I would do.
Over the years I have adapted the recipe some, to make it my own. By that I mean I added some nutmeg and cloves, because there is no point buying that expensive little can just to make gingerbread men every year.
Long story short, this recipe makes 2 loaves of the most delicious zucchini bread.

Zucchini Bread

Ingredients:


  • 3 eggs
  • 1 cup oil
  • 2 cups sugar
  • 3 cups grated zucchini
  • 1 tablespoon vanilla
  • 3 cups flour
  • 1 teaspoon soda
  • 1 teaspoon salt
  • 1/2 teaspoon baking powder
  • 1 tablespoon cinnamon
  • 1 teaspoon nutmeg
  • 1 teaspoon cloves

Directions:

  1. Cream the first three ingredients. 
  2. Add the next three ingredients and mix.
  3. Add the remaining ingredients.
  4. Mix until combined.
  5. Equally separate the dough in to 2 greased loaf pans.
  6. Bake at 325 degrees for 1 hour

Enjoy!

Wednesday, August 28, 2013

Garden Week: Garden Veggie Bake

This recipe makes a delicious side dish. We had it with barbecue chicken and then again less than a week later with steak. It is really good.

Garden Veggie Bake:

Serves: 8

Ingredients:


  • 8 small red potatoes
  • 4 small summer squash
  • handful of green beans
  • 1 large yellow onion
  • Kraft Fresh Take [Italian Parmesan]
  • 1/2 stick margarine

Directions:

  • Preheat the oven to 400 degrees
  • Cut the summer squash and potatoes so they are similar in size
  • Place the summer squash, potatoes, and green beans in a large pan, fill with water, bring to a boil
  • Boil for approximately 20 minutes. [This could vary on the size of your squash/potatoes. You want to boil them until they are just starting to get soft, but do not boil them until they are so soft they fall apart, I did this just to speed up the process and to make sure that the potatoes would be soft]
  • After boiling, strain the vegetables and transfer to a 9x13 glass baking dish. 
  • Slice onion, and sprinkle on top of cooked veggies
  • Open the Fresh Take and sprinkle on top. [I used a spatula to mix the vegetables to make sure they are coated]
  • Break up the margarine and sprinkle around the top of the veggies
  • Cover with aluminium foil, bake for 20 minutes
  • Uncover and bake for an additional 20-25 minutes until cheese is melted, and veggies are cooked through.
  • Serve and Enjoy!


    **All opinions of Kraft Fresh Take are my own, I was not compensated by the company in any way, I just think it is really delicious and easy to bake with**


Tuesday, August 27, 2013

Garden week: Hot garden salsa


Every year my dad's garden gets a little bit bigger. It does not bother me because I do not have to weed it, and there are fresh vegetables all summer long. 
Every year I make salsa for my dad. He loves it HOT, so this recipe makes a hot salsa. My mom cannot eat it because it is too hot. I like hot salsa, but this is even a little hot for me.

The ingredients are simple, but mix together to make a very fresh tasting salsa.

Garden Fresh Salsa:

Ingredients:

  • 2 roma tomatoes
  • 2 green tomatoes [tomatillos] 
  • 1 small onion
  • a handful of cherry tomatoes [I add these because I like their orange color]
  • 1 jalapeno
  • 1 habanero pepper
  • 1 clove of garlic
  • Handful of cilantro

Directions:

Place all the ingredients in to a food processor. If you want a milder salsa you can leave the seeds out of the peppers, or leave out the peppers all together. Be careful cutting a pepper, make sure you do not touch your eyes immediately after. I speak from experience, it will hurt. Bad.  I cut the ends off of the peppers and added the whole thing, seeds and all. [I will stress again, this is a HOT salsa]. Blend all the ingredients together until roughly chopped. I like a chunky salsa, so I leave larger pieces.
Enjoy!
[Please note that this picture was taken after my dad and brother discovered the salsa, and helped themselves]


Monday, August 26, 2013

Garden Week: Eggplant steaks

 Welcome to garden week! The first post is going to be an easy one. When I say easy, I mean really easy. Eggplant "steaks"!. I love eggplant, my family is split on it. When I made this dish 5/6 family members ate it, and enjoyed it. Even my eggplant hating father ate a full piece and said "not bad", a compliment coming from him.

Here is what you need:

  • Eggplant, sliced [about the thickness of a steak]
  • Garlic Salt
  • Pepper
  • Olive Oil
All you have to do:
  • Slice the eggplant
  • Brush with olive oil
  • Sprinkle with garlic salt and pepper
My brother grilled for me. On our charcoal grill he put the steaks on the warming rack, grilled them for 7 minutes on each side, then three minutes on each side. 
[Those were his exact instructions to me when I asked for a description.]

Delicious and Easy.


And because it is Monday, here is some Maynard for you:
Maynard, the real life pillow pet


Saturday, August 24, 2013

Garden Week!

Next week on the blog, I am dedicating the posts to the garden. All the recipes that are posted will be made using fresh vegetables from my dad's garden. I had a garden once, nothing grew. My dad has a monster garden full of flourishing plants. The gardens were on the same property, very close to each other, and used the same soil. Yet mine bit the dust. Luckily for me, my dad and brother have green thumbs or something and I get to enjoy the fruits, or vegetables, of their labor all summer long. So check back all week long for different garden inspired dishes!!


Friday, August 23, 2013

Cookie decorating 101. Segment One


My last post was on cookie decorating. I thought I would occasionally share some cookie decorating tips with you. If I can do it, so can you.
When I first started decorating cookies, I had one pastry bag and one #2 tip. Ever since my first cookie bouquet, every time I go to Michaels or JoAnn Fabrics I buy a new icing tip. I have started my cookie decorating kit, but it continues to grow all the time.

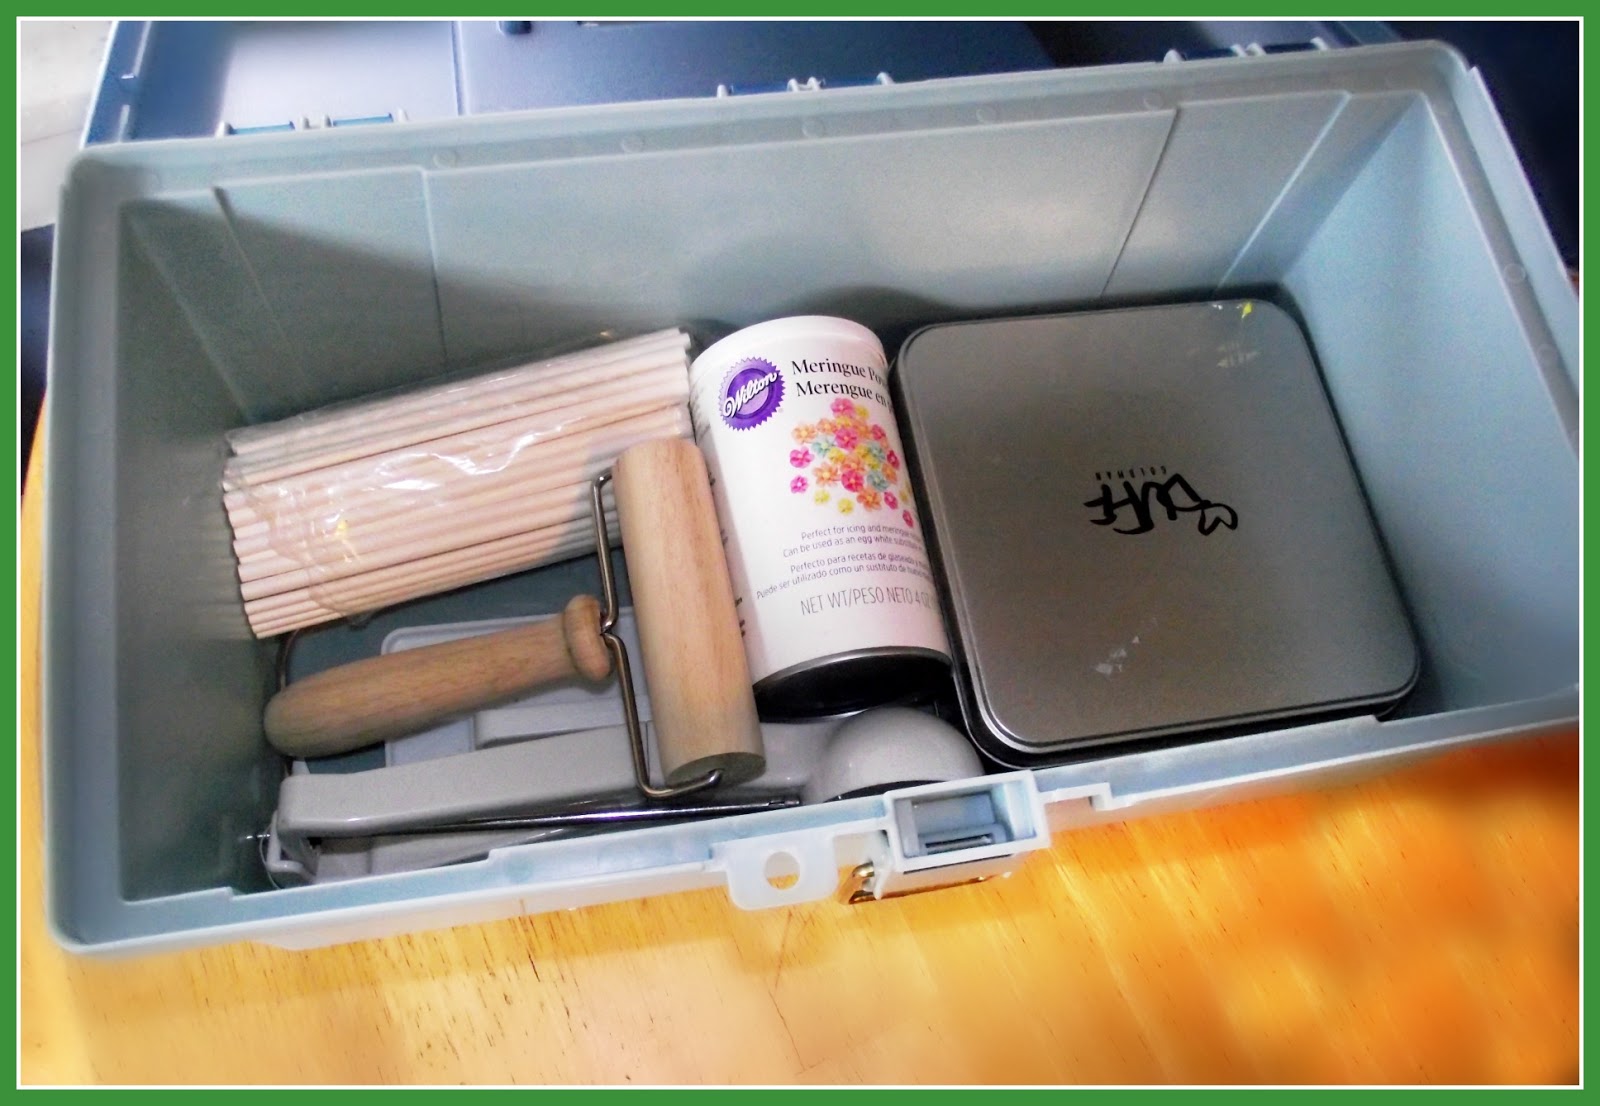
I store all of my cookie decorating supplies together in a kit that my Aunt gave me for Christmas. My brother calls it the cookie tool box.

Here is what is inside my cookie toolbox:
I recently discovered couplers and I love them. They make cookie decorating so much easier, especially when doing cookies with lots of detail and color. I also have the basic set of Wilton gel paste food coloring, and the tips I have collected so far.


The bottom is where I store random stuff. In the "Duff" box are all my pastry bags, I also store things like extra cookie sticks, extra meringue powder, and my fondant roller.
Speaking of fondant, I recently started using that for cakes. More on that later.


Thursday, August 22, 2013

Angel Food Cake


My earliest memories of angel food cake are walking in to grandmas kitchen and seeing the angel food cake pan upside down on a bottle of soda. I am sure my grandma has made so many angel food cakes that she has lost count. She would also joke: "do you know how to make angel food cake?...You take 12 egg whites and beat the devil out of them" [For the record, my grandma, or "gram" as we call her, is 90 years old//hilarious//adorable]. I can remember helping her as a child. She would let me separate the egg whites even at a young age. When the bowl would be filled with shells, she would calmly scoop them out and say something kind like "that makes it taste better", "there is no use crying over something like that" [she also said that when I dropped and broke an antique cake stand, "no use crying over that"]. My gram is just the greatest lady ever.

The classic angel food cakes all use the same few ingredients, precisely mixed together to create a delicious, light, fluffy, and spongy treat. Whenever I make angel food cake I go to my girl, Martha. [Martha Stewart, the woman knows her desserts] I have all of her cookbooks and use them basically every time I bake. The recipe I use is this one. It has yet to let me down.

Angel Food Cake

                                                   Recipe from Martha Stewart

Ingredients:

  • 1 cup cake flour
  • 1/4 teaspoon salt
  • 12 large egg whites, room temperature
  • 1 teaspoon cream of tartar
  • 1 1/4 cups sugar
  • 2 teaspoons pure vanilla [Martha's recipe uses Vanilla Extract, I used pure vanilla]

Directions:

Separate 12 egg whites. I guess you can use the yolks for custard, or at least that is what is suggested...      (I threw them away. Sorry, environment?)
When you first put the egg whites in the mixer, beat them for about 1 minute before you add the 
cream of tartar. [<---- which was the only ingredient I needed to make a run to the store for.]
The next part is important, because you do not want to deflate the egg whites. 
  • Get a large bowl. Add 1/4 of the egg whites to the bowl, then re-sift 1/4 of the flour mixture on to the egg whites. Repeat 4 times, until all the egg whites and flour are in the bowl. 
  • Gently fold the mixture together, do not over mix/stir.
  • Transfer to your cake pan and bake at 350 degree for 25-30 minutes. 
  • Turn the pan upside down. (I balanced mine on my brothers water bottle, my grandma used to use a pop can)
  • Leave the cake this way for an hour, then remove from the pan.
I covered my cake in Cool Whip and Strawberries, because this cake was for my Aunt's birthday and strawberries are her favorite. There are all kinds of toppings you can use, but strawberries are my go-to. They are the best fruit, hands down. 
**Make sure to LIKE my d.i.y apartment on facebook! Just click the Facebook bubble on the right and click LIKE. It is so easy**