Saturday, October 26, 2013

I'm back!.... and I brought pumpkin seeds!

Hello.
First off, let me start by apologizing for my absence. Many things have happened.
For one, I am all moved in to my amazing apartment in the city. It is close to work and large and has a washer/dryer in the apartment and I love it.
Second, I am sorry for not blogging. I promise I have legit excuses. Like how I did not have internet for a while. Then I put off getting a router because I kept forgetting because I would just use my phone for internet. Also, I did not have a good camera because I left my camera at my parents and my iPhone camera was scratched.
Excuses aside, I'm back! I have internet in my apartment and I have a brand new iPhone 5 to take pictures with.
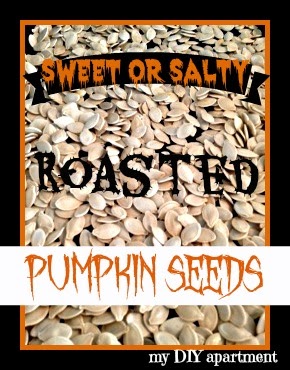
Please accept my apology in the form of delicious pumpkin seeds.

I love fall. I love the weather, the smells, and that I can wear ugg boots and scarves.
Every year the sibs and I carve pumpkins. It's a tradition that has been going for about 20 years. For some reason we have never made pumpkin seeds. People make them and give them to us, or we buy them, but we never make them. This year my brother suggested we make some.
I agreed to make him pumpkin seeds if he would gut my pumpkin. I cannot do it. It makes me gag. I think it is a texture thing... and I digress.

We had a lot of seeds, so when I asked what kind of flavors my fam wanted, at the same time one yelled sweet and one yelled salty. So, I made both.

I do not think that making pumpkin seeds could be any easier. Before you start, here are some helpful tips:
1. When carving the pumpkins put all the "guts" in to a large bowl. We (my brother) added some water and separated out the seeds when we were finished carving
2. Let the seeds dry overnight. We put ours in a single layer on a cookie sheet overnight
3. You could really add any flavor you wanted. The sky is the limit here. I did not measure my add ons, I just kind of guesstimated by how many seeds I had.
4. Preheat the oven to 300 degrees

For the salty seeds I added:
-Worcestershire sauce
-Seasoned Salt
-Garlic Salt
-Pepper

For the sweet seeds I added:
-Sugar
-Cinnamon
-a tiny pinch of ginger, nutmeg, and cloves

I separated the dried seeds in to two piles. I put them in Ice cream buckets and added my ingredients with a little EVOO. I put the top on the bucket and shook to coat.

I then drizzled some EVOO on two cookie sheets and laid the seeds in a single layer. I baked them for 45 minutes total, but every 15 minutes I took them out of the oven to stir them.
And that is it. Total time was less than one hour.
So easy. Also, Pumpkin seeds are full of antioxidants, protein, fiber, and healthy fats. Always a bonus.


Happy Fall!


Friday, September 6, 2013

Now this is happening...

I'm Moving!
Tomorrow!

Today, I am packing. Kind of... I WILL be packing. As soon as I stop watching Parks and Recreation on Netflix.

Also, I will not have internet until Monday. [[Thank goodness for the iPhone]]. So my posts will be a little light until then. By "a little light" I do mean none at all. Just to clarify.

See you next week!
Enjoy the last little bit of summer.


Wednesday, September 4, 2013

D.I.Y chair re-do?

I do not know if this is considered a re-do or a re-vamp? Is that a word? I do not know... I do know this was a very easy and inexpensive d.i.y project.
I got this chair for free... which made me instantly love it. The arms of the chair were detached and had some weird pockets hanging off of them that I did not love.
I washed the base of the chair, and I covered the arms with fabric.
Then I made a pillow using cute grey chevron fabric that I got for $1.99 a yard at JoAnn's. $1.99 a yard, people! [[Long story short, I bought a lot of grey chevron fabric]].
These were the weird pockets that were on the chair.. I cut them off.

I cut my fabric [yellow with little brown and white flowers, also a steal at JoAnns] Then I stapled it to the bottom.

Then my brother attached the arms for me, and it was finished!!
Free chair, Easy re-vamp.
My favorite kind of D.I.Y :)


Tuesday, September 3, 2013

Quick Post: Coupon Deals

This is just a quick post to share with everyone the awesome deals that I got this week at Rite Aid!
I got every thing in the picture for only $12.60
Retail value of the items is $48.01
By combining store sales, store coupons, and store deals I was able to save around 80% on items that I use every day.
My favorite deal... probably the toothpaste. It is regular $6.49. It is on sale for $4.99. And there was an in-ad coupon for $4 off 1. Making it only 99 cents!

I hope you got some great deals coupons this week! It was the beginning of the month, which means the P&G Brand Saver was the coupon insert. [[It is the best for all cleaning//hygiene supplies]]

Monday, September 2, 2013

Veggie Packets


This post would have gone well with garden week, because it is all garden veggies [[except some of them I did buy from the store, but they were on sale, and don't tell my dad]].
On Sunday nights at my parents we have dinner. In the summer that means that dad grills something [[charcoal grill, in case you were wondering, he is just really proud of his charcoal grill]] and I usually make the side dish, usually garden veggies because we have a ton of them. Seriously, an abundance of vegetables, this is my dad's garden. When he first started gardening it was just a small garden, but continues to grow each year.
[[See what I mean]]
This recipe makes a great side dish, and it is really easy too:
1. cut the veggies
2. put them in packets
that is as complex as it gets here, people.

Veggie Packets

Ingredients:

[[This recipe makes 8 packets, but it can easily be cut in half, or vegetables exchanged for any veggies you have at home/or that are on sale]]
  • 12 small yellow potatoes
  • 2 small onions
  • 2 small summer squash
  • 1 1/2 cartons of mushrooms. [[Store bought]]
  • 1/2 bag of baby carrots
  • 2 cloves of garlic
  • 3/4 cup olive oil
  • salt 
  • pepper

Directions:

1. Preheat the oven to 400 degrees
2. Cut the veggies up so they are small, and approximately all the same size [[I cut my veggies a little smaller so that they would cook faster//all the way through]]

3. Mix all the veggies together   
 
4. Mince the cloves of garlic
5. In a small bowl, whisk together olive oil and minced garlic. Add salt and pepper, whisk.
6. Add dressing and mix veggies
7. Cut 8 squares out of aluminium foil
8. Place approximately 2 scoops of the veggie mixture on to the middle of the foil, and fold in to a pocket
   
9. Bake in the oven for 1 hour
10. Enjoy!

[[Maynard Monday]]
"Blue steel-ing" it in his yellow bow tie


Sunday, September 1, 2013

Coupon Sunday: Coupons 101


You guys, I love coupons.
I hate spending money on food, because it is expensive and I am just going to eat it.
I hate paying full price for anything, and love getting something for a good deal. My budget is low.
Enter: Coupons
I am not extreme with coupons by any means, but I have been able to save money on everyday supplies and food that I need.
Here are some tips that I have learned during my [short] time as a couponer:
  1. Don't cut all your coupons out. I used to, and would have a hard time finding them. Now I just cut them out when I need them. A lot of the coupon sites name the date and what coupon booklet the coupon is found in. Enter: my coupon folder. That I love.
    It is organized by month and then by date. This way I can easily pick out the coupon insert that I need, and clip my coupon. It is also easier to view coupons in booklet form.
  2. Check the internet. I get a lot of coupons from here. The coupons are changed every month. I will print the ones that I know I could use. Most coupons only allow a limited number of prints, so when I see them, I print them. 
  3. Try the company website. A lot of times companies will directly post coupons for their products. Many will give promotions if you 'like' them on facebook you can print a coupon. 
  4. Does the store have a rewards program? Many times you can clip coupons directly from the store website to use. Some stores even allow you to add these with your clipped coupons, check your favorite stores coupon policies. 
  5. Couponing takes time. It really does. I try not to let myself get caught up in it. If you do not want to search for the deals yourself there are websites that you can sign up for that will find the deals for you. Some are free, some you pay for memberships. 
  6. Saving money is awesome. 'Nuf said. 

Coupon deal of the week:

At Meijer, Vlasic pickle relish is at a price freeze for $1.02. On the Vlasic website there is a coupon for $1 off 1, making the relish on $.02! 
Click here to for a direct link to the coupon

Friday, August 30, 2013

Changes coming soon...

Starting next week I will be making some *minor* changes to the blog. By that, I mean I am introducing "Coupon Sunday" and "D.I.Y Friday".

On Sundays I will be posting tips that I have learned during my time in the coupon world, and a coupon deal of the week to help you save some money. Because, you guys, saving money is awesome.
Another change will be D.I.Y Friday, which means on Fridays there will be a post about a D.I.Y craft or project. [Most likely me making something for my apartment]


And do not forget to check back during the week for the usual random posts on my life, baking, cooking, etc...

Hope you enjoyed Garden Week!
See you on Sunday :)

Thursday, August 29, 2013

Zucchini Bread


The last post of garden week will not be a savory one, but a sweet one. A sweet, delicious, moist bread recipe. I found this recipe when I was in high school. It was in one of those books that we sold as a fundraiser where parents all contributed recipes. [[I think I have 4 or 5 copies]] I probably filled my recipe book selling quota by selling one to every member of my family. I'm not positive, it just really sounds like something I would do.
Over the years I have adapted the recipe some, to make it my own. By that I mean I added some nutmeg and cloves, because there is no point buying that expensive little can just to make gingerbread men every year.
Long story short, this recipe makes 2 loaves of the most delicious zucchini bread.

Zucchini Bread

Ingredients:


  • 3 eggs
  • 1 cup oil
  • 2 cups sugar
  • 3 cups grated zucchini
  • 1 tablespoon vanilla
  • 3 cups flour
  • 1 teaspoon soda
  • 1 teaspoon salt
  • 1/2 teaspoon baking powder
  • 1 tablespoon cinnamon
  • 1 teaspoon nutmeg
  • 1 teaspoon cloves

Directions:

  1. Cream the first three ingredients. 
  2. Add the next three ingredients and mix.
  3. Add the remaining ingredients.
  4. Mix until combined.
  5. Equally separate the dough in to 2 greased loaf pans.
  6. Bake at 325 degrees for 1 hour

Enjoy!

Wednesday, August 28, 2013

Garden Week: Garden Veggie Bake

This recipe makes a delicious side dish. We had it with barbecue chicken and then again less than a week later with steak. It is really good.

Garden Veggie Bake:

Serves: 8

Ingredients:


  • 8 small red potatoes
  • 4 small summer squash
  • handful of green beans
  • 1 large yellow onion
  • Kraft Fresh Take [Italian Parmesan]
  • 1/2 stick margarine

Directions:

  • Preheat the oven to 400 degrees
  • Cut the summer squash and potatoes so they are similar in size
  • Place the summer squash, potatoes, and green beans in a large pan, fill with water, bring to a boil
  • Boil for approximately 20 minutes. [This could vary on the size of your squash/potatoes. You want to boil them until they are just starting to get soft, but do not boil them until they are so soft they fall apart, I did this just to speed up the process and to make sure that the potatoes would be soft]
  • After boiling, strain the vegetables and transfer to a 9x13 glass baking dish. 
  • Slice onion, and sprinkle on top of cooked veggies
  • Open the Fresh Take and sprinkle on top. [I used a spatula to mix the vegetables to make sure they are coated]
  • Break up the margarine and sprinkle around the top of the veggies
  • Cover with aluminium foil, bake for 20 minutes
  • Uncover and bake for an additional 20-25 minutes until cheese is melted, and veggies are cooked through.
  • Serve and Enjoy!


    **All opinions of Kraft Fresh Take are my own, I was not compensated by the company in any way, I just think it is really delicious and easy to bake with**


Tuesday, August 27, 2013

Garden week: Hot garden salsa


Every year my dad's garden gets a little bit bigger. It does not bother me because I do not have to weed it, and there are fresh vegetables all summer long. 
Every year I make salsa for my dad. He loves it HOT, so this recipe makes a hot salsa. My mom cannot eat it because it is too hot. I like hot salsa, but this is even a little hot for me.

The ingredients are simple, but mix together to make a very fresh tasting salsa.

Garden Fresh Salsa:

Ingredients:

  • 2 roma tomatoes
  • 2 green tomatoes [tomatillos] 
  • 1 small onion
  • a handful of cherry tomatoes [I add these because I like their orange color]
  • 1 jalapeno
  • 1 habanero pepper
  • 1 clove of garlic
  • Handful of cilantro

Directions:

Place all the ingredients in to a food processor. If you want a milder salsa you can leave the seeds out of the peppers, or leave out the peppers all together. Be careful cutting a pepper, make sure you do not touch your eyes immediately after. I speak from experience, it will hurt. Bad.  I cut the ends off of the peppers and added the whole thing, seeds and all. [I will stress again, this is a HOT salsa]. Blend all the ingredients together until roughly chopped. I like a chunky salsa, so I leave larger pieces.
Enjoy!
[Please note that this picture was taken after my dad and brother discovered the salsa, and helped themselves]


Monday, August 26, 2013

Garden Week: Eggplant steaks

 Welcome to garden week! The first post is going to be an easy one. When I say easy, I mean really easy. Eggplant "steaks"!. I love eggplant, my family is split on it. When I made this dish 5/6 family members ate it, and enjoyed it. Even my eggplant hating father ate a full piece and said "not bad", a compliment coming from him.

Here is what you need:

  • Eggplant, sliced [about the thickness of a steak]
  • Garlic Salt
  • Pepper
  • Olive Oil
All you have to do:
  • Slice the eggplant
  • Brush with olive oil
  • Sprinkle with garlic salt and pepper
My brother grilled for me. On our charcoal grill he put the steaks on the warming rack, grilled them for 7 minutes on each side, then three minutes on each side. 
[Those were his exact instructions to me when I asked for a description.]

Delicious and Easy.


And because it is Monday, here is some Maynard for you:
Maynard, the real life pillow pet


Saturday, August 24, 2013

Garden Week!

Next week on the blog, I am dedicating the posts to the garden. All the recipes that are posted will be made using fresh vegetables from my dad's garden. I had a garden once, nothing grew. My dad has a monster garden full of flourishing plants. The gardens were on the same property, very close to each other, and used the same soil. Yet mine bit the dust. Luckily for me, my dad and brother have green thumbs or something and I get to enjoy the fruits, or vegetables, of their labor all summer long. So check back all week long for different garden inspired dishes!!


Friday, August 23, 2013

Cookie decorating 101. Segment One


My last post was on cookie decorating. I thought I would occasionally share some cookie decorating tips with you. If I can do it, so can you.
When I first started decorating cookies, I had one pastry bag and one #2 tip. Ever since my first cookie bouquet, every time I go to Michaels or JoAnn Fabrics I buy a new icing tip. I have started my cookie decorating kit, but it continues to grow all the time.

I store all of my cookie decorating supplies together in a kit that my Aunt gave me for Christmas. My brother calls it the cookie tool box.

Here is what is inside my cookie toolbox:
I recently discovered couplers and I love them. They make cookie decorating so much easier, especially when doing cookies with lots of detail and color. I also have the basic set of Wilton gel paste food coloring, and the tips I have collected so far.


The bottom is where I store random stuff. In the "Duff" box are all my pastry bags, I also store things like extra cookie sticks, extra meringue powder, and my fondant roller.
Speaking of fondant, I recently started using that for cakes. More on that later.


Thursday, August 22, 2013

Angel Food Cake


My earliest memories of angel food cake are walking in to grandmas kitchen and seeing the angel food cake pan upside down on a bottle of soda. I am sure my grandma has made so many angel food cakes that she has lost count. She would also joke: "do you know how to make angel food cake?...You take 12 egg whites and beat the devil out of them" [For the record, my grandma, or "gram" as we call her, is 90 years old//hilarious//adorable]. I can remember helping her as a child. She would let me separate the egg whites even at a young age. When the bowl would be filled with shells, she would calmly scoop them out and say something kind like "that makes it taste better", "there is no use crying over something like that" [she also said that when I dropped and broke an antique cake stand, "no use crying over that"]. My gram is just the greatest lady ever.

The classic angel food cakes all use the same few ingredients, precisely mixed together to create a delicious, light, fluffy, and spongy treat. Whenever I make angel food cake I go to my girl, Martha. [Martha Stewart, the woman knows her desserts] I have all of her cookbooks and use them basically every time I bake. The recipe I use is this one. It has yet to let me down.

Angel Food Cake

                                                   Recipe from Martha Stewart

Ingredients:

  • 1 cup cake flour
  • 1/4 teaspoon salt
  • 12 large egg whites, room temperature
  • 1 teaspoon cream of tartar
  • 1 1/4 cups sugar
  • 2 teaspoons pure vanilla [Martha's recipe uses Vanilla Extract, I used pure vanilla]

Directions:

Separate 12 egg whites. I guess you can use the yolks for custard, or at least that is what is suggested...      (I threw them away. Sorry, environment?)
When you first put the egg whites in the mixer, beat them for about 1 minute before you add the 
cream of tartar. [<---- which was the only ingredient I needed to make a run to the store for.]
The next part is important, because you do not want to deflate the egg whites. 
  • Get a large bowl. Add 1/4 of the egg whites to the bowl, then re-sift 1/4 of the flour mixture on to the egg whites. Repeat 4 times, until all the egg whites and flour are in the bowl. 
  • Gently fold the mixture together, do not over mix/stir.
  • Transfer to your cake pan and bake at 350 degree for 25-30 minutes. 
  • Turn the pan upside down. (I balanced mine on my brothers water bottle, my grandma used to use a pop can)
  • Leave the cake this way for an hour, then remove from the pan.
I covered my cake in Cool Whip and Strawberries, because this cake was for my Aunt's birthday and strawberries are her favorite. There are all kinds of toppings you can use, but strawberries are my go-to. They are the best fruit, hands down. 
**Make sure to LIKE my d.i.y apartment on facebook! Just click the Facebook bubble on the right and click LIKE. It is so easy**